In the dynamic world of Minecraft, one might often feel the urge to create their own personal server. This offers the ability to control every aspect of gameplay, from the mode of play to who gets to be a part of your unique block-building universe.
A custom server allows for fun-filled adventures with friends, the freedom to implement personalized rules, and the possibility of constructing your own narrative on your terms. But before we delve into how you can set this up, it’s crucial to be aware of the technical complexities involved.
How to Set Up Your Local Minecraft Server?
Guidelines: Please note that this step-by-step guide will assist you in creating your private Minecraft Server. However, this process entails modifying your home network’s configuration, and it’s recommended only if you’re technologically adept. Suppose you’d rather rent a small private server for your friends. Please proceed with caution while setting up your own Minecraft server, as Minecraft developers cannot provide support for personal networks or self-made servers.
Time needed: 45 minutes
Here’s how you can create a Minecraft Server on your computer to play Minecraft with your friends:
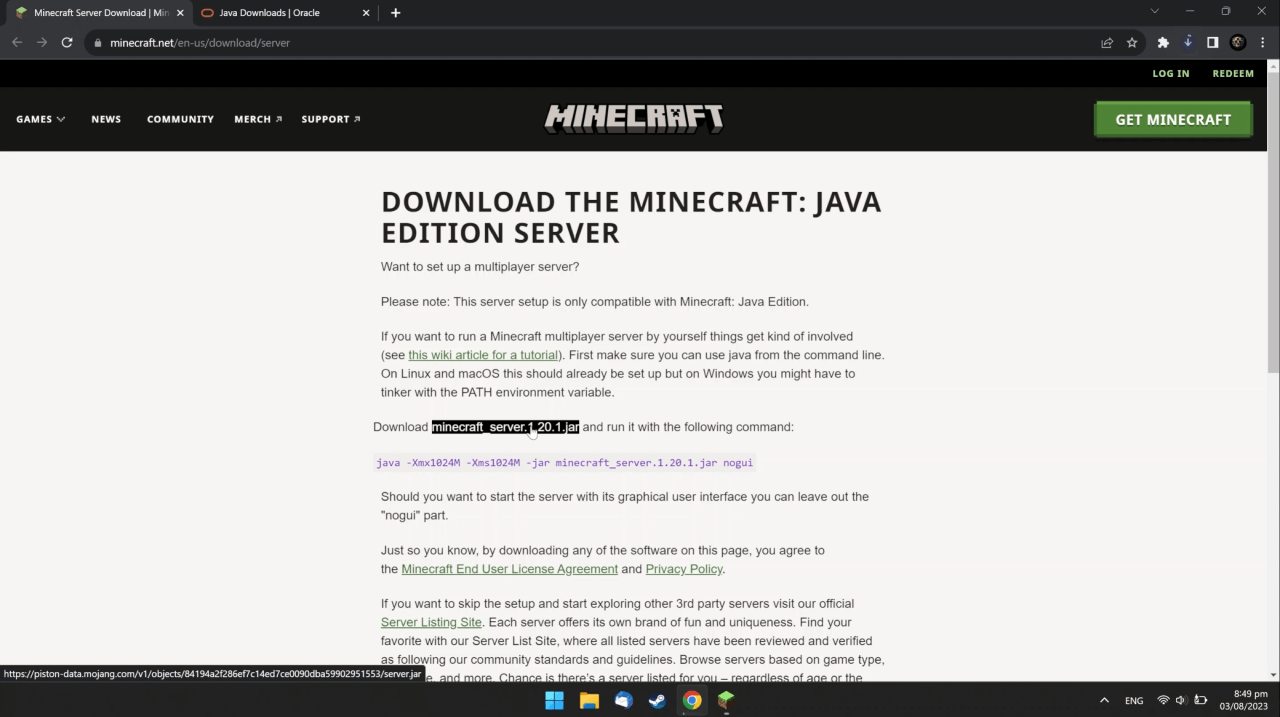
- Download the latest version of the Minecraft server from the minecraft.net official website.
Go to the Minecraft official website and download the latest version of the Minecraft server. Here you can find the direct link to the download page.

- Download the Java Development Kit installer from the oracle.com official website.
Then go to the Oracle official website and download the Java Development Kit (JDK) installer for your operational system. Java is strictly required to be installed on your computer to run Minecraft server. Here you can find the direct link to the JDK download page.

- Double-click the JDK installer file to install Java on your computer.
Now minimize your browser, find the Java development kit installer file, and double-click it to install Java on your computer.

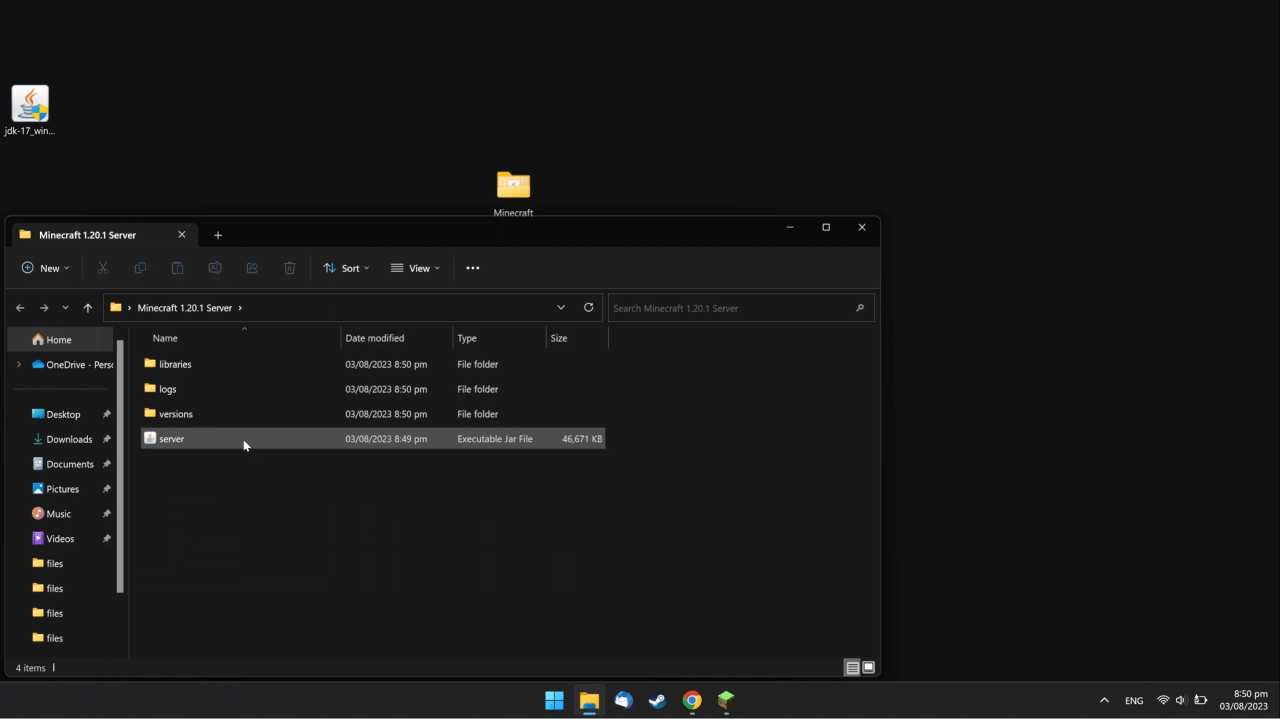
- Double-click the Minecraft installer file to install the Minecraft server files on your computer.
Then create a new folder, preferably named ‘Minecraft Server’ to keep all your server files in. Find the Minecraft server installer file named server.jar, and move it to the folder you’ve just created. Now open the folder, double-click the installer file, and wait till all server files are generated.
- Edit the eula.txt file and set the ‘eula’ option to ‘true’.
Once all server files are generated, find the eula.txt file and double-click it to start editing. Find the
eula=falseline and changefalsetotrue. This means that you agree to the Minecraft End User License Agreement. Then save and close this file. - Double-click the server.jar file to run your Minecraft server.
Now you can check whether your server is set up correctly. Go back to the folder with your server files, find the server.jar file, and double-click it to run your server. If Windows Defender asks you to allow Java access to your network, allow it.

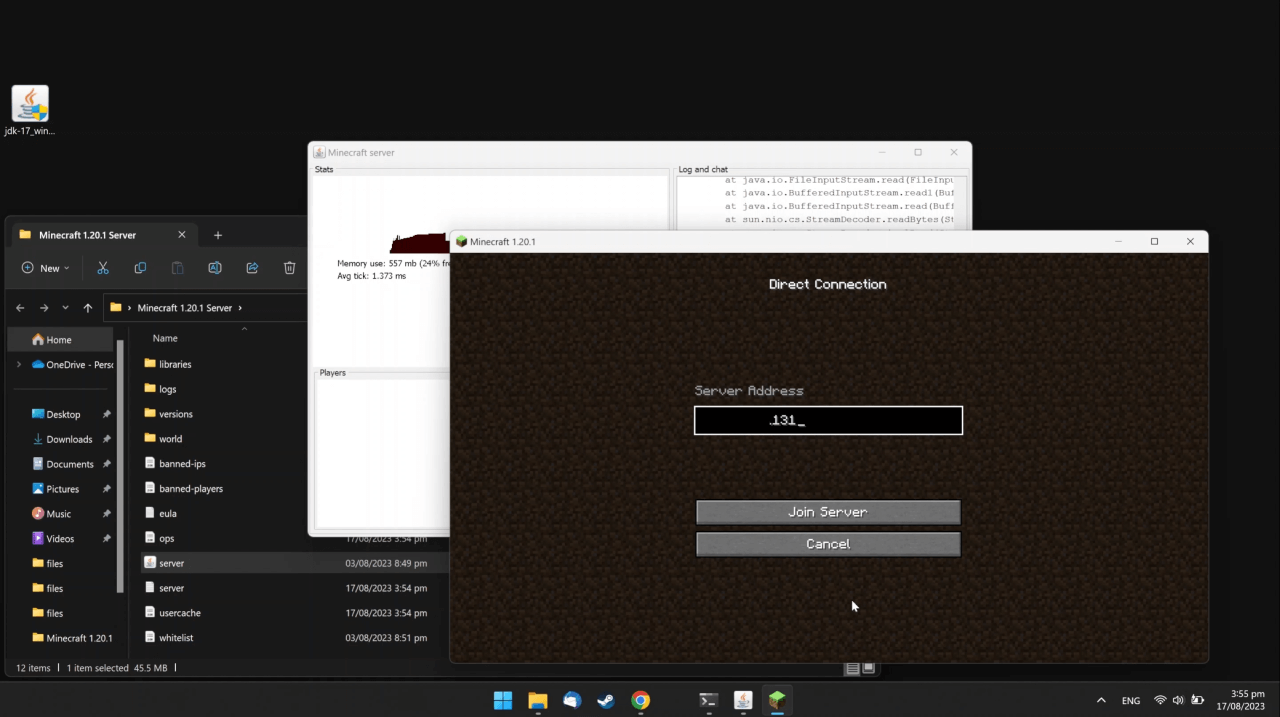
- Launch your Minecraft client and connect to your Minecraft server to check that everything is working fine.
Now launch your Minecraft client, select ‘Multiplayer’, and click the ‘Direct Connection’ button. In the ‘Server Address’ field, enter
localhostand click ‘Join Server’. If the game launches, it means that you did everything right, and now you are playing on your own Minecraft server. Congratulations! Now it’s time to open access to your server for your friends. - Launch Command Prompt and find the information about your IP address.
To open access to your server for your friends, you need to configure port forwarding on your router. Press the Win key on your keyboard to open the Run utility. In the Open field, type
cmdand press Enter to launch Command Prompt. In the Command Prompt, typeipconfigand press Enter to view the information about your network configuration. Find the line with your IPv4 address and copy it to your clipboard - Edit the server.properties file and paste your IP address to the ‘server-ip’ line.
Go back to the folder with your Minecraft server files, find the server.properties file, and double-click it to start editing. Find the line with the
server-ipoption and paste your IP address there. Then save and close this file. - Open Command Prompt again to find the information about Default Gateway address.
Open Command Prompt again, find the line with your Default Gateway address, and copy it to your clipboard.
- Paste your Default Gateway inside the browser address field to open router settings.
Then open your browser, paste your Default Gateway address inside the browser address field, and press Enter. This will open your router configuration interface, and you might need to log into it. In this tutorial, we will configure port forwarding on the ASUS router.
- Go to the Port Forwarding section.
Find the ‘WAN’ settings and go to the ‘Port Forwarding’ section. Make sure that the ‘Port Forwarding’ feature is enabled and click ‘Add Profile’. Give this profile any name you want. ‘Minecraft server’ is a good name for this.
- Set 25565 as an external Port and your IP address as an internal address.
Set the ‘Protocol’ option to ‘Both’. Set 25565 as an ‘External’ and ‘Internal’ Port. Now go back to Command Prompt, copy your IPv4 address, and set it as ‘Internal IP Address’. Click ‘OK’ to save the settings.
- Find an instruction for your specific router if needed
Most likely, you have another router. If you don’t know how to forward a port on your router, you can find a tutorial on the Internet. Simply go to your favorite search tool, search for ‘how to forward port on’, and add your router model. In search results, look for the official website of your router manufacturer and click it to see more information. Just like that.
- Check your public IP address at whatismyip.com website
After you finish configuring your router, go to the whatismyip.com website or any similar website that will show you your public IP address. You can copy this address and give it to your friends, so they can join your server.
- Invite your friends to play on your Minecraft server
To join the Minecraft server you created on your computer, your friends have to launch their Minecraft client, go to the ‘Multiplayer’ menu, and click the ‘Direct Connection’ button. Here they need to paste your public IP address into the ‘Server Address’ field and click ‘Join Server’.
- Have fun!


Things you should know before creating server on your computer
Here are the most important things you must know if you want to create a good and secure Minecraft server on your computer.
- You must install all the Minecraft server files on your computer and configure them carefully. In addition, you must ensure that Java is installed on your computer and is running correctly.
- You must be able to tweak the network configuration on your router in order to set up port forwarding properly. This process varies depending on the router and can be quite a challenging task.
- You must have a powerful computer to run your own Minecraft server. It’s not just about playing Minecraft. It’s about managing an entire server on your computer that all your friends are playing on, which is resource-intensive.
- You must also have a good internet connection. Your server is connected to the Internet, and all your friends are connected back to you. So your network capacity should be good enough to handle all those connections.
- You must keep your computer online 24/7. When your friends make some progress on your server, they might want to play on it while you are busy doing other things. So you have to make sure that they can connect to your server at any time.
- You must take care of your privacy and only give your IP address to your friends and people you trust. Your server is hosted on your own computer and your own network connection. Anyone who knows the public IP of your computer will be able to find out where you live. Therefore, it might be dangerous to share your IP address with people you don’t know.
If you are missing some of these things, you should consider renting game server hosting. In this case, Fozzy Game Servers is your best choice because Fozzy Game Servers gets you covered with all your game server needs.
Create Minecraft server within minutes
Setting up your own server might seem daunting, but Fozzy Game Servers offers an uncomplicated solution. Here’s a rundown of the key advantages you can enjoy when renting a game server from Fozzy, as opposed to running a local server on your own computer:
- Ease of Management: Fozzy Game Servers takes care of all the technical aspects, freeing you from the stress of server management. You’ll gain access to a special gaming panel, making server management a breeze.
- Optimized Performance: Fozzy Game Servers ensures your server runs without a hitch, guaranteeing an optimized gaming experience. We provide the optimal amount of resources (CPU, RAM, DISC) for a comfortable gaming session!
- Dedicated Support: Got a question or stumbled upon an issue? Fozzy offers dedicated support to assist you with any problems you might face. We always respond to any inquiries promptly!
- Continuous Uptime: Fozzy’s servers promise continuous uptime, facilitating uninterrupted Minecraft adventures. Our servers boast a 99.99% availability rate!
- Convenience: Why fret over complicated setup details when you can rent a server and start playing instantly? Instead of spending heaps of time creating your server, you can get a ready-made one from Fozzy Game Servers in just a few minutes!
Remember, with Fozzy Game Servers, you’re only a click away from your perfect Minecraft experience. If you’re aiming to have a server up and running within minutes, simply follow this link!
